Module Setup and Submission
Overview
We’re using Git and GitHub for setting up and submitting modules. Git is a version control system for tracking changes you make to files. GitHub is a hosting service for distributing Git repositories. These tools are essential for collaborative coding projects and it’s important to your development as a data scientist that you learn how to use them.
That said, Git and GitHub have a difficult learning curve. In this course, we’re going to limit ourselves to using some basic features. In future courses or when you’re doing research in a lab, you’ll have opportunities to learn more advanced Git and GitHub workflows. For more information about how data scientists use Git and GitHub, I recommend reading Bryan (2018).
In brief, module setup has two steps and submission has three.
Create your own remote repo on GitHub from the module template repo.
Create your local repo by cloning your remote to your computer.
Now your computer is set up for the module. Complete the activity according to the instructions on the course website. When you’re done, proceed to the following steps.
Commit your changes in the local repo.
Push your local commit to the remote repo.
Open an Issue on GitHub and tag the instructors.
There’s a decent chance these instructions feel overwhelming. It’s true, there’s a lot to learn even to set up and submit your modules - certainly trickier than uploading a PDF to Canvas. I encourage you to stick with it! After you set up and submit a couple modules you’ll feel a lot more confident, and by the end of the quarter you’ll have gained valuable experience with an important data science tool.
Module setup
Step 1: Create your remote
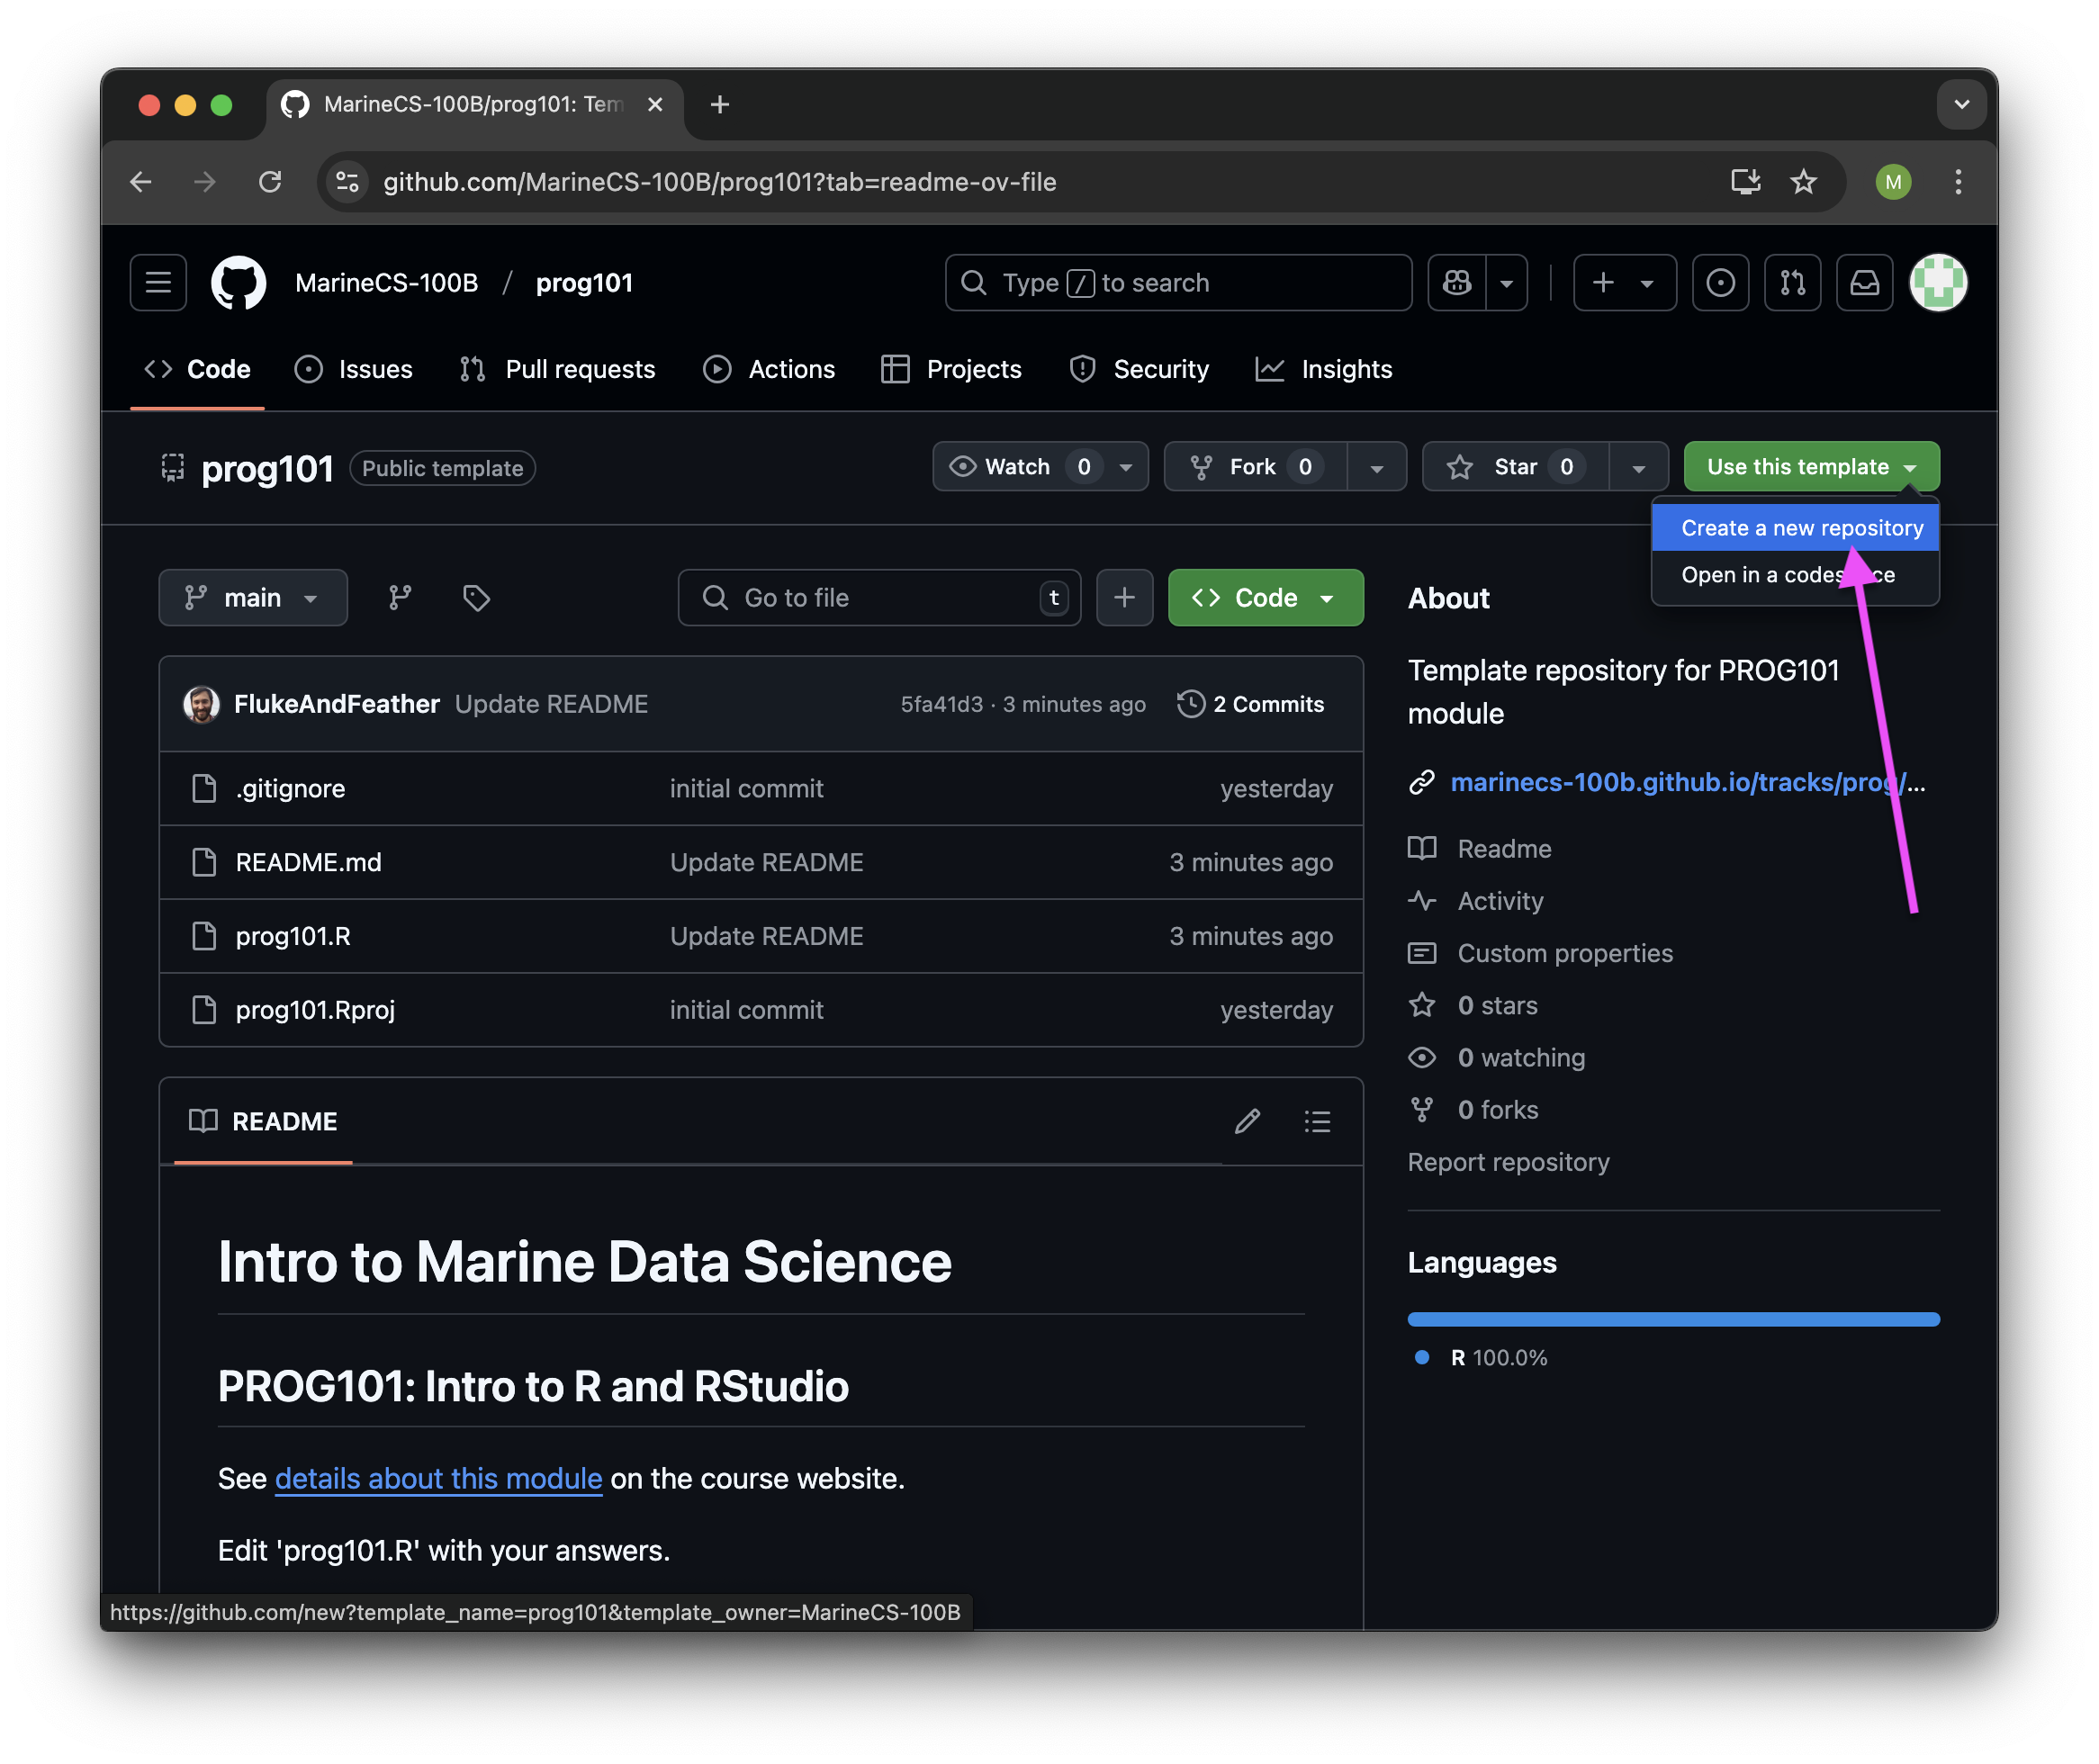
Navigate to the template repo on GitHub. Click on Use this template > Create a new repository.
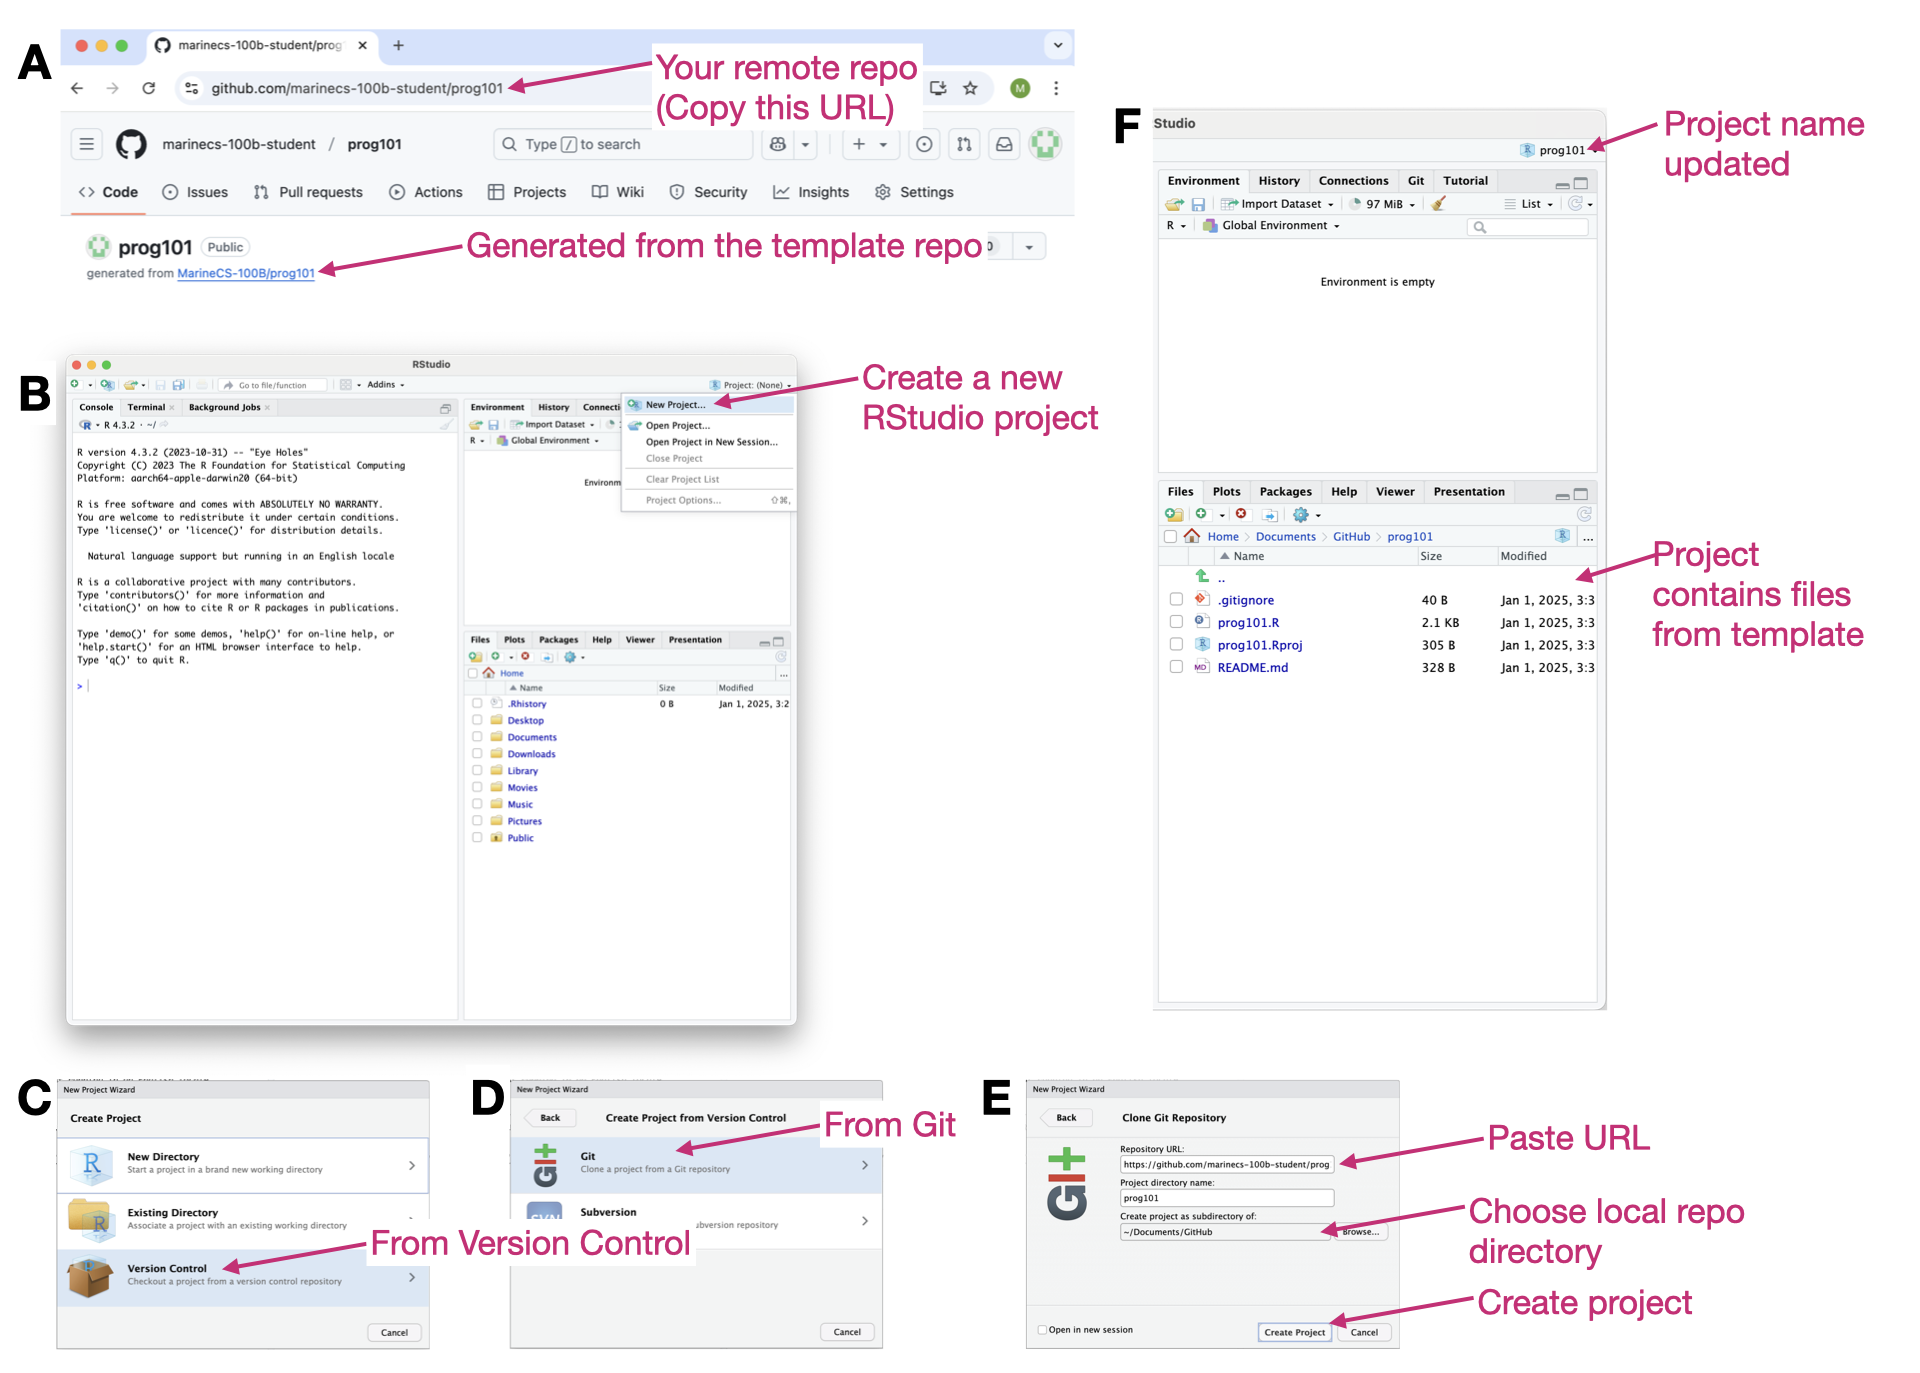
Fill out the “Create a new repository” form. The only field you need to fill out is “Repository name”. Make it match the module repository name (e.g., prog101). Click on the green “Create repository” button. Once GitHub creates the repo, you should see a URL that looks like “github.com/[your username]/[module name]”.
Step 2: Clone your local repo
Copy your remote repo’s URL (A) then switch over to RStudio and create a new RStudio project (B). In the New Project Wizard, choose Version Control > Git then paste your URL and choose the local directory where you want to keep your local repositories (C-E). After clicking Create Project, RStudio will relaunch; you should see the project name updated in the top right and the Files pane should show the files from the template repo (F).
At this point you’re ready to work on the module. You have a local Git repository on your machine that is connected to your remote repository on GitHub.
Module submission
We’ll use GitHub Desktop for steps 3 and 4. Make sure GitHub Desktop recognizes your repo.
Step 3: Commit your changes
After you complete the module it’s time to commit your changes. This updates your local repository. In GitHub Desktop, you should see a list of files with changes on the left and the line-by-line differences on the right. Fill in the commit message below and hit the blue Commit to main button.

Step 4: Push your commits
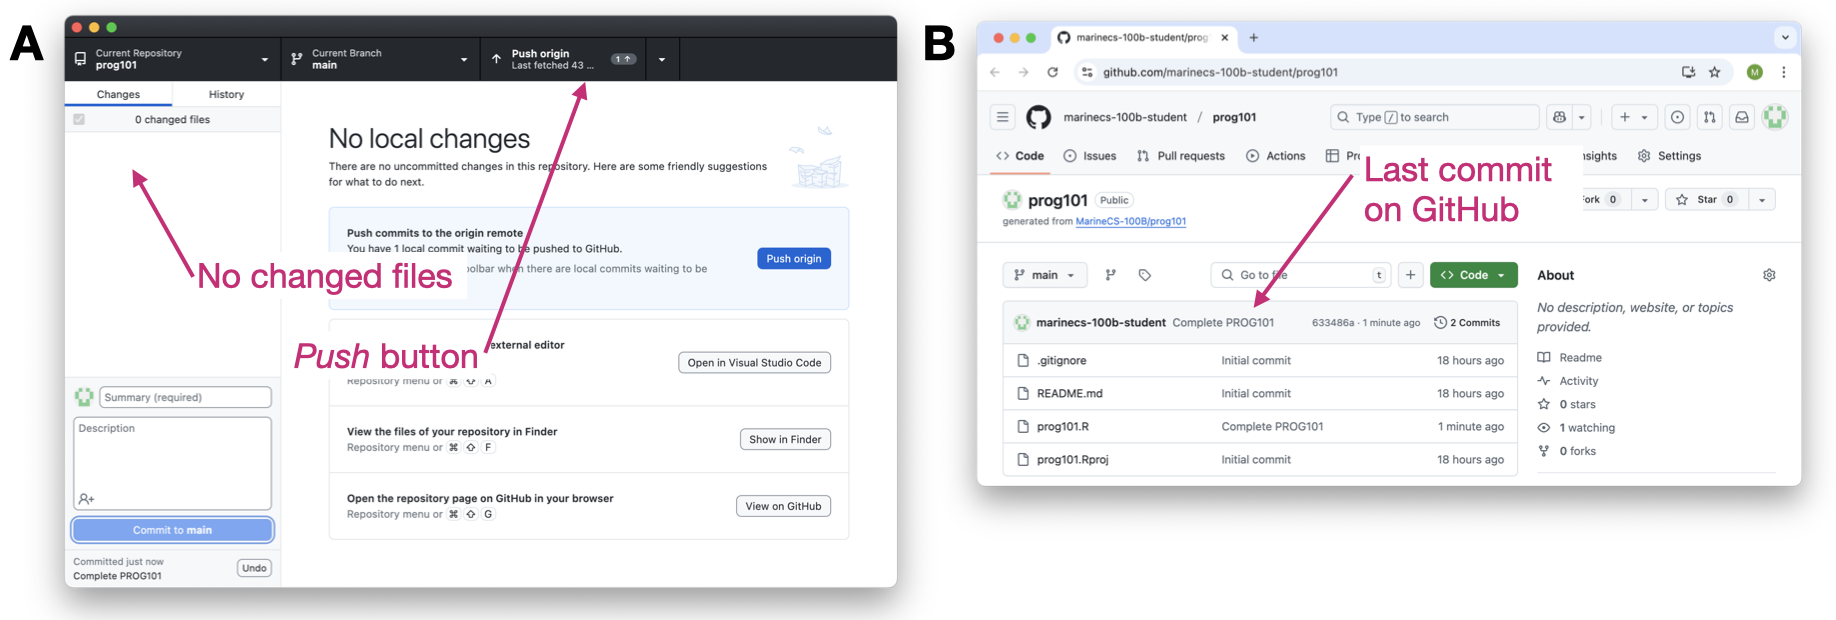
After committing, you should no longer see any changed files. Click the Push origin button (A). This updates your remote repo on GitHub, which you can see online (B).
Step 5: Open an Issue
Click the Issues tab on GitHub (in the browser) and create a new Issue. Mention me (@FlukeAndFeather) in the Issue, which will let me know you’ve submitted your module. If you’re submitting the in-class portion for your pair, mention them as well. Congrats! You’re done!
